Customize Options in WordPress
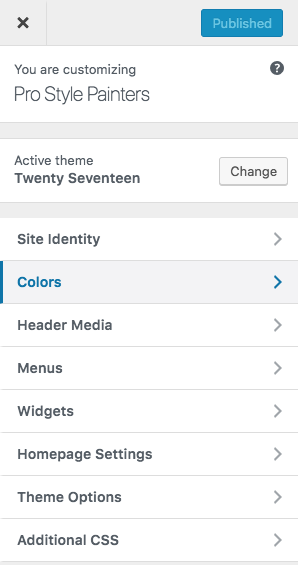
 For Web Wednesdays, we have been showing you how to take a website from simply an idea to a fully functional website. After installing WordPress & setting your theme. It is time to begin looking at the customize options in WordPress. You can do this by hovering over “Appearance” in the WordPress Dashboard on the left side of the screen. From here, you can click on Customize and you will be sent to the Customization menu for your theme. All themes have different options, but on the WordPress Twenty Seventeen theme, there are only a few customization settings.
The things we will look at in our Customize Options in WordPress video are Site Information, Colors, Header Media, & Homepage Settings. The other items on the Customize menu can be (and will be) tweaked directly through the dashboard.
Site Information will be where you set the SEO name of your website along with the tagline. You also have the option to decline displaying your site information here. You may be wondering why someone would want to do that. The reason is very simple. If you have a custom header with a logo and a tagline already in the image, then you may decline using this option. However, I do not suggest that approach.
You can certainly put your logo in an image, but then you would still want the Site Information displayed in the corner. If your business/site name is only in the graphic image and not overlain as text within the Site Information setting, then Google will not be able to pick up the name of your website and your tagline. Taglines are also good for SEO purposes. When it comes to getting picked up by Google, you need all the free help you can get.
Making Images for Your Site
If you haven’t done so already, I heavily suggest getting Adobe Creative Cloud so you can use Photoshop for making your images. Under Site Information, you are going to have the option to set a Site Image. This image will serve two functions: it will be the icon displayed on a browser tab & it will also be the icon if someone were to save your website to their homepage on the phone. The size of this image is 512 pixels by 512 pixels. It’s very easy to create a simple text favicon in Photoshop by making one letter in a cool font matching your color scheme.
You will also have to create a header media image for your site. This will be the image that people will think of when they remember your website. This means you need for this image (and any text on it) to really pop & stand out. Many people have a very difficult time trying to make text blend in well with a header image. Header images are rarely solid colors because that is boring. People will either use a stock photo or an abstract background with different colors. To create a header image that solves this problem, check out our Customize Options in WordPress tutorial video.

Thanks for reading!


