Category : Website Building

Uncategorized Website Building

How to Set Up WP Menus

How to Set Up WP Menus

how to set up wp menusAs we continue our website building series, today we will be looking at how to set up WP menus. Setting up your menus in WordPress is a great way to be able to organize and display your content. Without an easy to navigate website, you will have a very high bounce rate because your users will get frustrated and leave. They need to be able to quickly find what they are looking for on your site. A well configured menu on the header will accomplish this task.

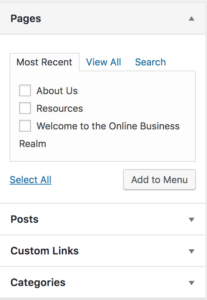
Before we actually create the menu itself, there is one important thing we must do. Before you can organize your website, you must have all of your pages created. This does not mean that we are going to design all of the pages from start to finish. However, we are going to create the pages as placeholders for our menu. Common pages to consider making are a Home page, a Contact Us page, an About Us page, and a Services page. Once you have created all of your page names and created a placeholder for each one, then it is time to begin actually making and organizing the menu.

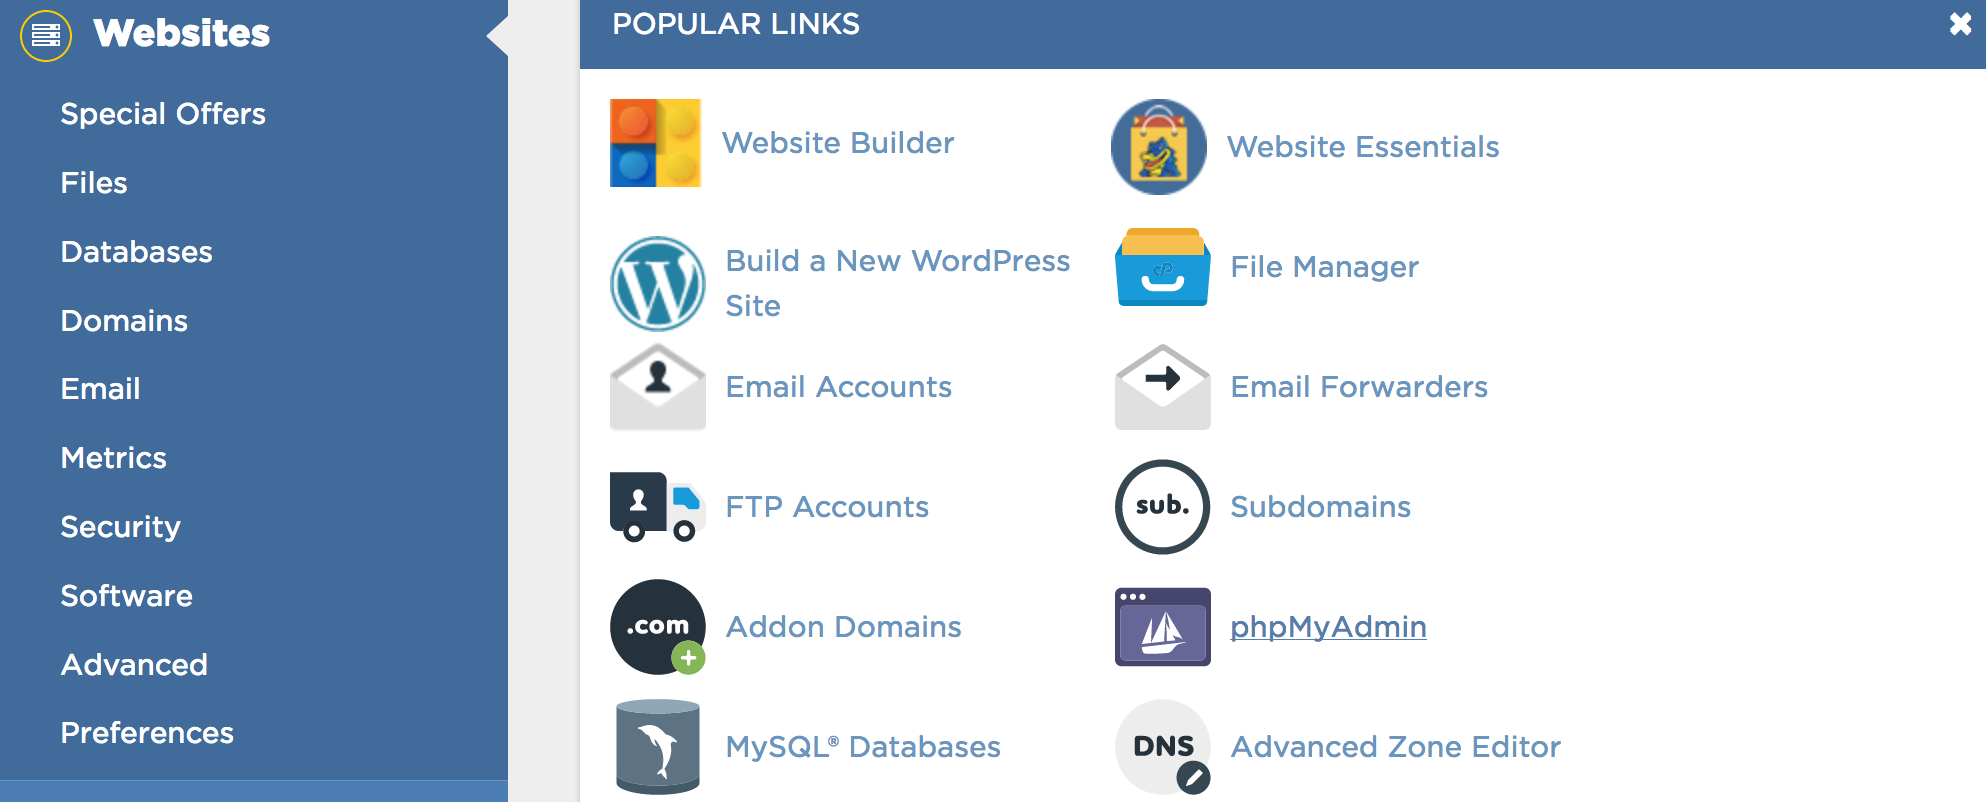
To begin this process, go to Appearance>menus. Before you can organize the menu, you must create the menu. Do this by entering a name in the input box and hitting “Create Menu”. Now add the pages from the left side to your menu. You can also do this with blog categories or individual posts. Once the menu items are moved to the menu, you can move them and arrange them by simply clicking and dragging them into the proper order.

Setting Up WP Menus is Simple

how to set up wp menusIt is very easy to set up the menus once you have the hang of it. Now let’s talk about different levels of the menus. You can take one of the menu items and drag it slightly to the right and it will become a drop-down menu. This means you can hover over the menu item on your website and a new menu will pop up. This is very useful when organizing your website. With drop-down menus, users will be able to find what they are looking for even faster. Anytime you can make the user experience easier, then you will improve your traffic.

So what would you do if you wanted to create an unclickable menu item with a drop down? For example, you have a Services menu that individually lists all of your services, but you don’t want an actual “Services” page. To do this, you would use the custom links area of the menu page. For the link, you would simply type a hashtag. When we were kids we called them pound signs, but nonetheless, you type a # in the space. This makes that individual item unclickable. This is a useful tip that many novice designers do not know about.

Thanks for reading and don’t forget to watch our “How to Set Up WP Menus” tutorial video!

Read More
Website Building

How To Customize Options in WordPress

Customize Options in WordPress

customize options in wordpress
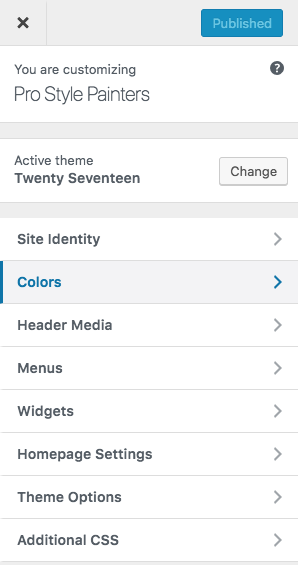
For Web Wednesdays, we have been showing you how to take a website from simply an idea to a fully functional website. After installing WordPress & setting your theme. It is time to begin looking at the customize options in WordPress. You can do this by hovering over “Appearance” in the WordPress Dashboard on the left side of the screen. From here, you can click on Customize and you will be sent to the Customization menu for your theme. All themes have different options, but on the WordPress Twenty Seventeen theme, there are only a few customization settings.

The things we will look at in our Customize Options in WordPress video are Site Information, Colors, Header Media, & Homepage Settings. The other items on the Customize menu can be (and will be) tweaked directly through the dashboard.

Site Information will be where you set the SEO name of your website along with the tagline. You also have the option to decline displaying your site information here. You may be wondering why someone would want to do that. The reason is very simple. If you have a custom header with a logo and a tagline already in the image, then you may decline using this option. However, I do not suggest that approach.

You can certainly put your logo in an image, but then you would still want the Site Information displayed in the corner. If your business/site name is only in the graphic image and not overlain as text within the Site Information setting, then Google will not be able to pick up the name of your website and your tagline. Taglines are also good for SEO purposes. When it comes to getting picked up by Google, you need all the free help you can get.

Making Images for Your Site

If you haven’t done so already, I heavily suggest getting Adobe Creative Cloud so you can use Photoshop for making your images. Under Site Information, you are going to have the option to set a Site Image. This image will serve two functions: it will be the icon displayed on a browser tab & it will also be the icon if someone were to save your website to their homepage on the phone. The size of this image is 512 pixels by 512 pixels. It’s very easy to create a simple text favicon in Photoshop by making one letter in a cool font matching your color scheme.

You will also have to create a header media image for your site. This will be the image that people will think of when they remember your website. This means you need for this image (and any text on it) to really pop & stand out. Many people have a very difficult time trying to make text blend in well with a header image. Header images are rarely solid colors because that is boring. People will either use a stock photo or an abstract background with different colors. To create a header image that solves this problem, check out our Customize Options in WordPress tutorial video.

customize options in wordpress

Thanks for reading!

Read More
Website Building

Setting Up Your WordPress Theme

Setting Up Your WordPress Theme

setting up your wordpress themeToday we are continuing our series, Web Wednesdays. In today’s video we are going to be focusing on setting up your WordPress Theme. So this begs the question, what is a WordPress theme?

If this is your first time setting up WordPress, then it is important to understand what a theme is and what it does. The best way to think about it is an anatomical reference. Your blog is the “skin” to your website. It’s what people are going to see the moment they visit your page. Your functionality and content could be incredible, but without the right theme, people will quickly be turned off by your website… and most likely they will leave before they ever get the chance to look under the hood.

While your visitors will see your theme, the theme does also affect the functionality. Each theme comes with settings and/or customization options for things such as your header, sliders, menus, footer, widgets, & more. It is absolutely pivotal that you get to know all of the settings within your header. When I add a new theme to a website I’m working on, the first thing I do is go look at the settings. If the theme does not have settings I like then I will change the theme. There is nothing worse than working with a theme that does not have a lot of customization.

For instance, some themes only allow you to have a text based logo. Just imagine how frustrating it would be to make a beautiful website only to find that it won’t allow you to put your beautifully designed logo at the top of your page. Sure, you could add it within the content… but that is not the best way to brand your business.

Choosing Your WordPress Theme

There are so many different ways to find a WordPress theme. The first question you have to ask yourself is whether or not you would like to spend money on a theme. If you are comfortable paying for a theme, then I suggest strolling over to the Envato Market and searching their Themeforest themes. Most of the themes there run anywhere from $29 to $59. They are fairly priced and these are full themes that will also come with support. Personally, I love Themeforest themes.

If you are looking for a free theme, then you will be able to search within the WordPress platform. It’s easy to search within WordPress for a great theme. The issue with the free themes, is that most likely the themes you find are going to be “Lite” versions of premium themes. The goal of the Lite themes is to give you an idea of what the full version or premium version can offer you above and beyond what you get with the Lite theme. It’s basically a way for these themes to advertise their full version… which of course will come with a cost. Some of the free WordPress themes will offer everything you need, but more times than not you will end up frustrated.

setting up your wordpress th

Thanks for reading & don’t forget to check out our tutorial video, “Setting Up Your WordPress Theme.”

Read More
Website Building

Getting Started With WordPress Dashboard

Getting Started With WordPress Dashboard

getting started with wordpress dashboardThis week, we are continuing with our web series about how to build a website from start to finish. We have already purchased a domain name, set up our hosting, installed WordPress, and now we are getting started with WordPress Dashboard. The first thing you must do before investigating the dashboard, is to login to your site. To do this, type /wp-admin after your domain name. It would look like this: http://www.YourDomainName.com/wp-admin. One quirky aspect of the WordPress admin URL is that the “wp-admin” must be typed in lower case letter only. If you were to type “WP-Admin” then you will not be able to get to your admin. To my knowledge, this is literally the only URL address I have ever encountered where the case of the letter matters.

Once you have pulled up your admin login screen, type in your username and password. My email address never seems to work for any sites I have created with WordPress (between 75-100). You will need to use your username here. If you forget your username or password, click Lost Password. You will be prompted to type in the email address associated with your username and WordPress will email you a reset link. Be careful about this though, because my Password Reset link usually gets sent to my spam instead of my main email inbox. Once you have logged into your account, you can now explore the dashboard.

Making Sense of WordPress

If you have never created a website before, WordPress can be quite intimidating at first. However, the platform is very easy to use with a little practice. One of the most frustrating things that WordPress does in my opinion, is allowing spam on their dashboard. Let me explain. If you go through any hosting service to install your WordPress, the hosting company has agreements in place with companies that integrate themes, widgets, & plugins. These agreements allow them to automatically install plugins & widgets onto your WordPress page.

To an experienced designer, this is not a huge problem because a good designer knows that these plugins are unnecessary. To the novice website builder, these extra plugins make the dashboard confusing. Two of the most common companies I’ve seen are JetPack and MojoMarketplace. To me personally, I have never found any use for either of these.

Plugins can create problems for your website. Certain plugins may cause certain parts of your theme to malfunction. Above all, having several plugins on your website will kill the speed of it. My philosophy is the less plugins, the better. Now of course, plugins are not the devil (even though Bobby Boucher’s mom may disagree!). Plugins are a necessary part of website building. They offer functionality that you will find solve a lot of problems. However, you only need to add plugins that you actually need. For this reason, my preference is to deactivate and delete every single plugin that comes preloaded within my WordPress site. When you delete all of those plugins, you will be amazed at just how much that simple action cleans up and simplifies your WordPress Dashboard.

Our tutorial video “Getting Started with WordPress Dashboard” shows you much more about the WordPress Dashboard.

Read More
Website Building

How to Install WordPress – Full Tutorial

How to Install WordPress

how to install wordpressDuring our Web Wednesday series, we have been showing you how to create a website from start to finish. We have walked you through choosing a domain name, choosing a hosting package, & setting your nameservers. Now it is time to move on to the next step and we are going to show you how to install WordPress to your website.

Read More
Website Building

How to Set Up Hosting and Nameservers

How to Set Up Hosting and Nameservers

For our Web Wednesday video series, we are  showing you how to build a website from start to finish. In last week’s video we showed you how to choose your hosting package. We recommend using Hostgator as it has a simple to use cPanel that makes setting up a website there very smooth. Once we have chosen our hosting package, now we must learn how to set up hosting and nameservers for our website. It may be a little intimidating at first for those new to website building, but it is actually quite easy.

how to set up hosting and nameservers

The first thing that users will notice when they sign into their Hostgator account, is the interface of the cPanel. The cPanel is the admin by which you can tweak anything having to do with the backend of your website. This includes the File Manager, Redirects, mx Records, & more. A large portion of available sections on the cPanel are virtually useless. If you do not know yet, every site you visit that sells hosting, domains, or online marketing solutions, unashamedly try to push every product under the sun. So pay attention in our “How to Set Up Hosting and Nameservers” tutorial video above and we will reveal to you which icons you actually need to pay attention to.

Setting Your Nameservers

Since GoDaddy (or whatever domain service you own) controls your URL address, you must make GoDaddy communicate with your new hosting company. When someone visits your website, GoDaddy must be able to send visitors directly to where your website is hosted at. To do this, you must be able to let GoDaddy know where to send the visitors to. You do this through setting what are called nameservers.

how to set up hosting and nameservers

If you navigate to the right side of your cPanel and scroll down the page, there is a section that contains your account information. Within that information, your nameservers are listed. They will generally be something like ns32.hostgator.com & ns33.hostgator.com. Your nameservers will always be sequential in number. This makes setting them through GoDaddy fairly easy.

Once you have located your nameservers on Hostgator, highlight and copy the first one by hitting cmd + C for Mac or ctl + C for PC. Navigate to your GoDaddy account. Once you have entered your account, click on “Manage DNS” next to the domain you are looking to host your website on. One of the options you will have on the Manage DNS screen will be to set your nameservers. Initially, “Default Nameservers” will be the current setting. To change the setting to reflect your Hostgator nameservers, simply click “Change”. In the first box, paste the nameserver address you copied in from your Hostgator account information. Then, paste the same address in the second box and simply change the number to reflect your other nameserver. After you have placed both nameserver addresses in the boxes, click save.

And just like that, you are ready to install WordPress! Thanks for reading & don’t forget to watch our tutorial video!

Read More
Website Building

How to Choose a Hosting Package

How To Choose A Hosting Package Thumb
Read More
Website Building

How to Pick a Domain Name For Your Website

How to pick a Domain Name Thumb

Picking a Domain Name on GoDaddy

how to pick a domain name on godaddyPicking a domain name is the first step in your journey toward starting a website or blog of any type. The domain is the concrete that holds your entire project together. If your foundation is not good, then the rest of your brand will suffer. It is extremely important to take your time and get the process right. I always purchase all of my domains on GoDaddy.com. In my opinion, GoDaddy is the best domain registrar on the internet.

Read More