How To Clean Up Your Gmail Inbox With Filters and Labels – Gmail Tutorial
Email can be a great tool most of the time, BUT other times it can be the biggest headache you’ve ever had. If you utilize Gmail as your primary email provider (which I would highly recommend), I have found a way to declutter your inbox using the built-in tools already provided to you. These tools are Labels and Filters. It’s a cross between automation and just tidying up your Gmail inbox. If you follow these few tips I have mastered, I believe your email life will be much more enjoyable.
What are Labels and Filters?
When it comes to using labels and filters within Gmail, you first must know what the are.
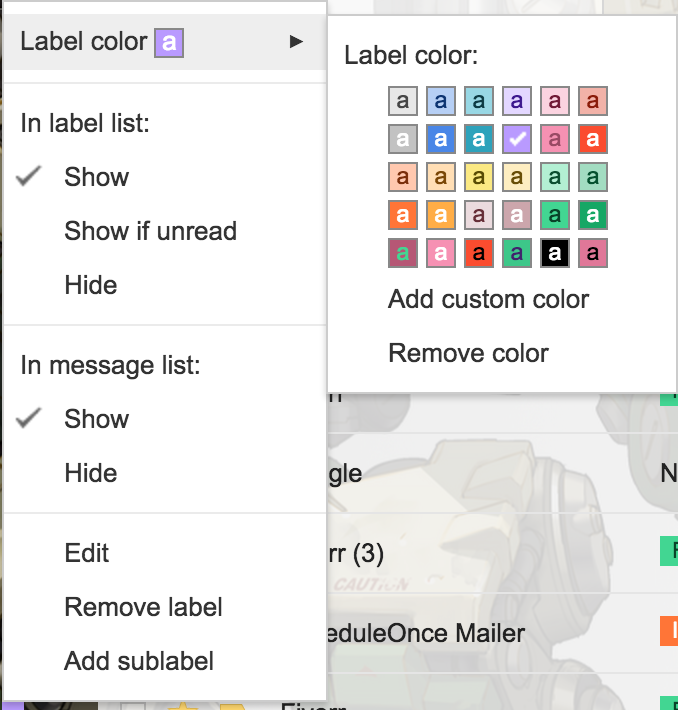
Gmail Labels: Labels allow you to organize your email messages into categories. They are similar to folders, however, unlike folders, you can apply more than one label to a single message.
Gmail Filters: Create rules to filter your emails. You can manage your incoming mail using Gmail’s filters to send an email to a label, or archive, delete, star, or automatically forward your mail. Create a filter.
I have recorded a video tutorial showing you in detail how to use Labels and Filters in detail that you can watch below.
How to setup Gmail Labels and Filters
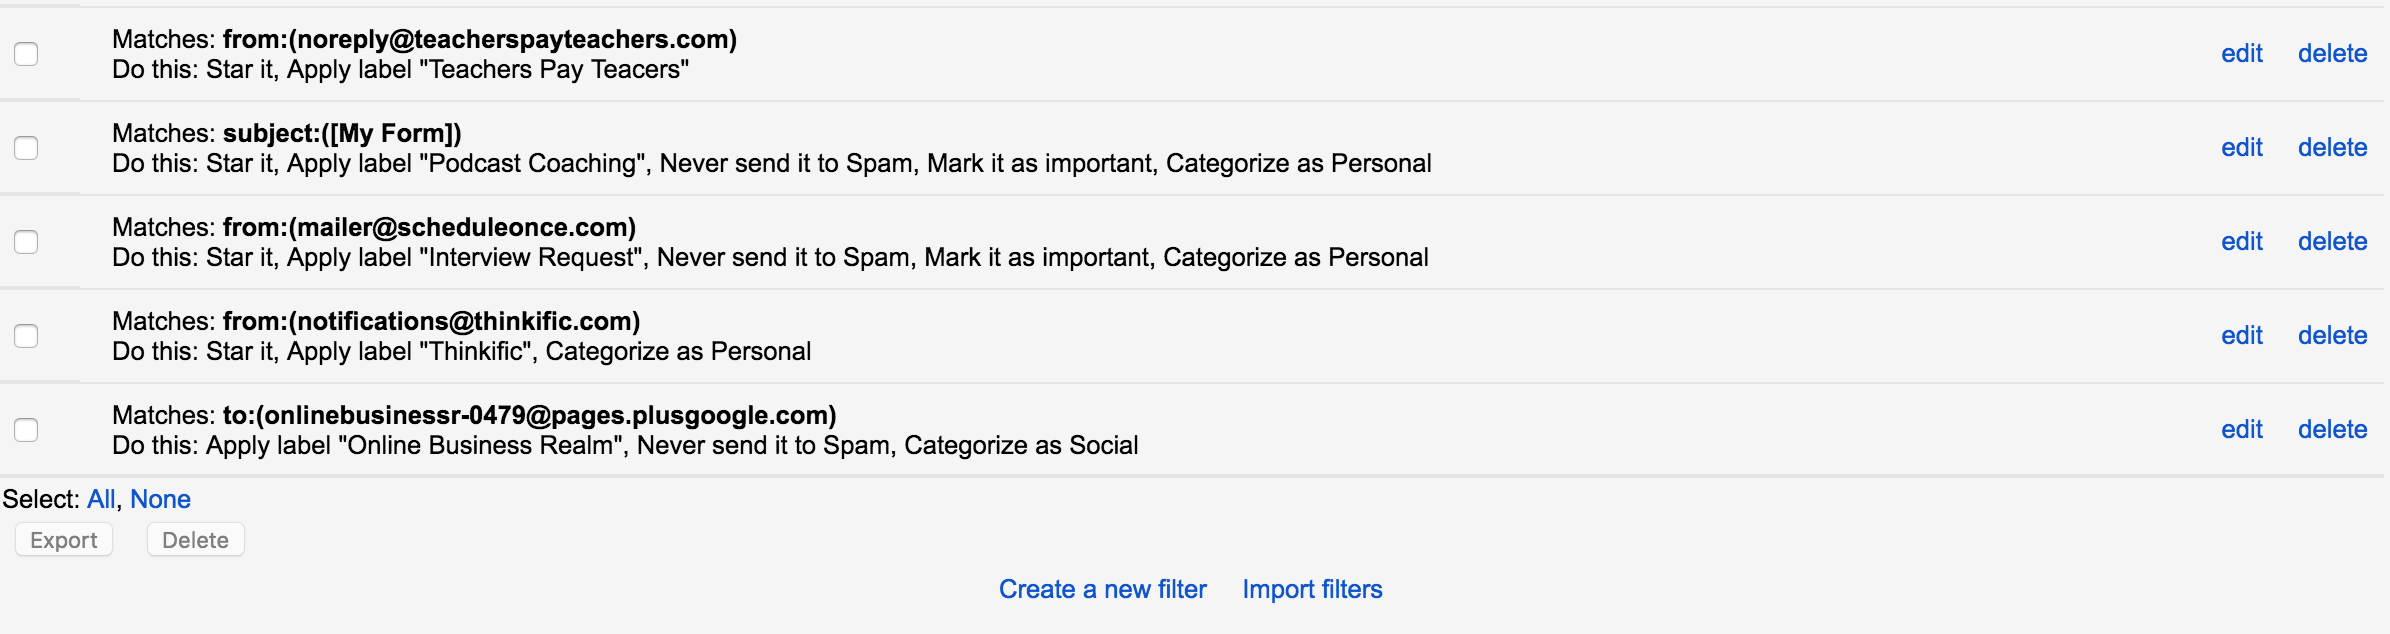
To access and create Gmail filters, you need to look for the gear icon in the top-right corner of your Gmail. In that drop-down menu, click “Settings,” then the “Filters” link at the top of the next page. This page shows you any existing filters, then lets you “Create a New Filter.”
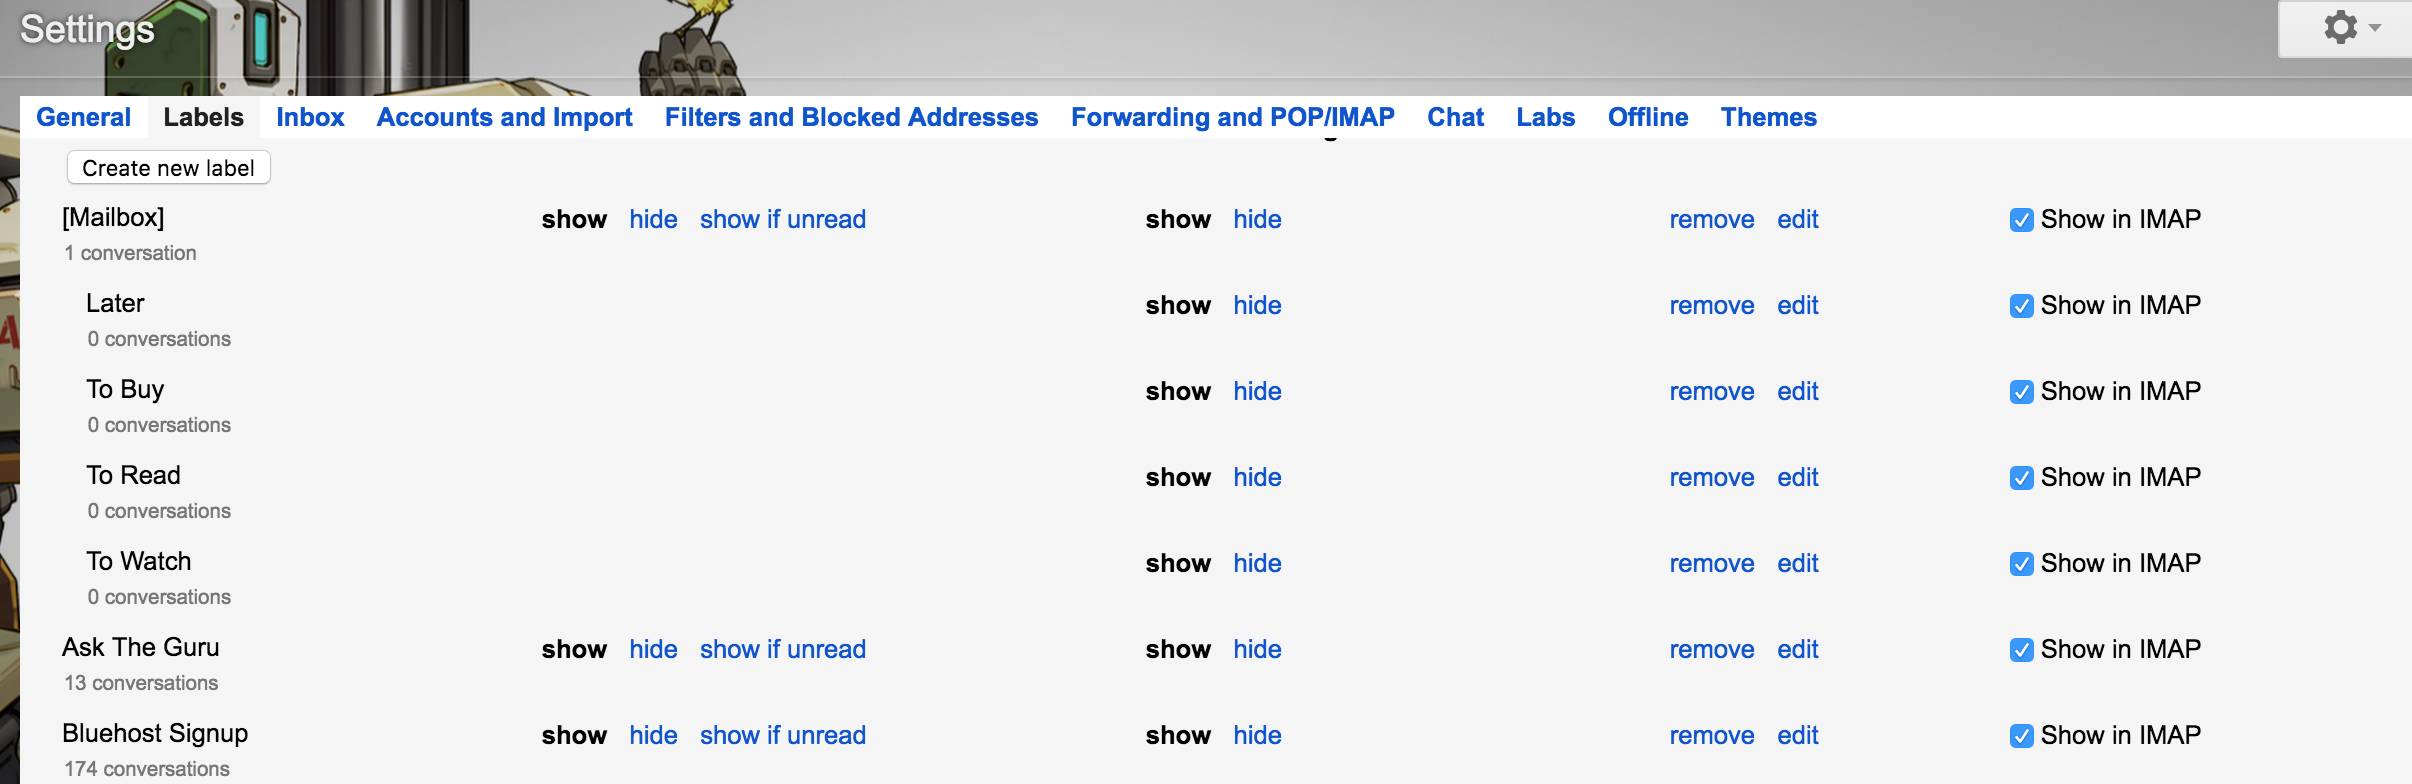
To access and create Gmail Labels, you need to navigate to that same gear icon in the top-right corner of your Gmail. Go to the settings tab once more and look for the tab called “Labels.” This page shows you any existing labels you have and lets you create new ones.
5 Tips To Master Your Gmail Inbox With Labels and Filters
1.) Automated Emails Marked As Read
There aren’t many things more frustrating than seeing that unread email count continue to rise throughout the day/week. One way to combat this problem is to create a filter that marks ALL automated emails as read. This filter will be for messages that you want to hold on to BUT don’t necessarily need to read right now.
You can set a whole domain name in your filters to follow this rule such as confirm@amazon.com, or just one particular address. This is perfect for emails from the post office, or an address that sends you multiple emails each week automatically. I use it for my email list “MailChimp,” when they are sending out the daily updates to my email lists.
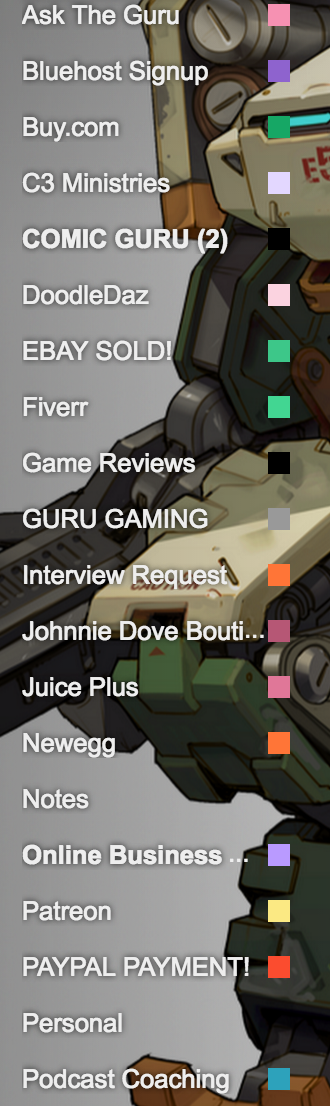
2) No Folder Problem
Although Gmail doesn’t have a folder feature like Outlook, you can compensate for this by utilizing folders. Folders are a great visual way of knowing what emails should go where. Folders can be changed to look different as well, which makes it easier to differentiate what is what on the sidebar of your inbox.
3.) Multiple Senders
Another great trick that I use is to put multiple email addresses into the same label/filter. I use this to keep project emails in the same folder. If you have a list of certain people, you want to designate with one label. Simply set up the filter as “John@gmail.com OR Joe@gmail.com,” and continue from there. This allows you to sort your emails by projects that you are working on with particular people.
4.) The Unsubscribe Trick 🙂
This may be my favorite Gmail hack of all time. It doesn’t directly have to do with filters and labels BUT it kind of does 🙂 Go into your inbox and search for the word “Unsubscribe,” any email list or newsletter that you have signed up with in the past will come up. When you have spare time, go through this list and begin to unsubscribe from all of those lists that fill up your inbox on a weekly basis!
5.) Auto-delete Emails That Just Don’t Stop
Preventing email from getting into your inbox is much better than dealing with it once it’s already there. That’s why I’d recommend making use of Gmail’s Block and Unsubscribe buttons. You could even get yourself a smart unsubscribe tool like Unroll.me.
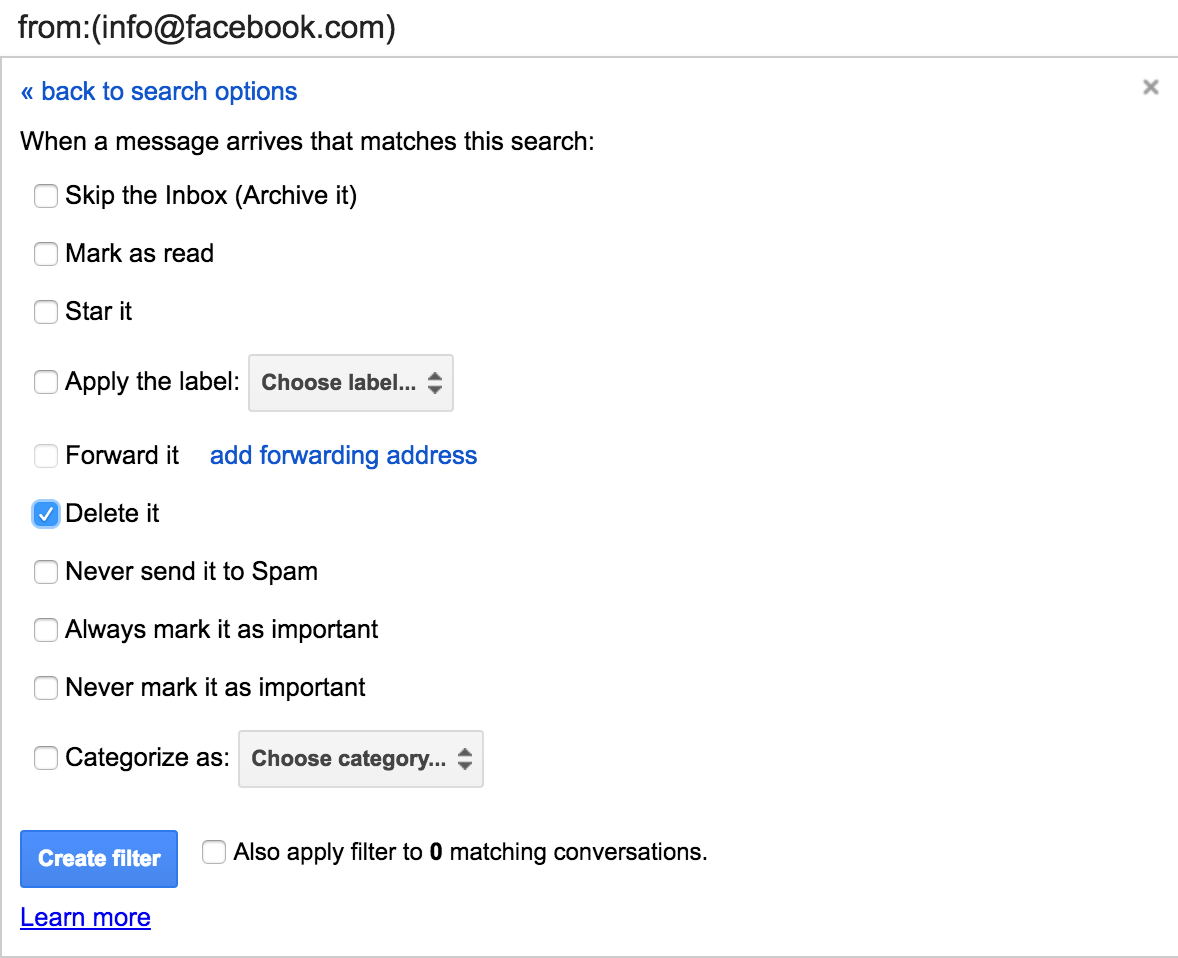
How do you deal with emails from mailing lists that don’t honor unsubscribe requests or from people that you can’t block even if you’d like to? With creating an auto-delete filter, you can filter out all of those unwanted emails before they even reach the inbox!
First, create a filter to identify emails based on the sender’s email address and tell Gmail to delete those emails automatically.
Don’t be afraid to play around with the Filters and Labels provided to you by Gmail. Utilizing these tools could help you reach inbox zero on a more consistent basis. If you have any tricks that you use to reach inbox zero let me know in the comments down below!