MyEtherWallet Tutorial
 We have had such a great response to our Crypto Thursday videos, that we have decided to post more cryptocurrency videos & tutorials. While Thursdays will still consist of videos showing you how to buy specific coins (and additional info about each coin), on Fridays we will be reaching out to other areas of cryptocurrency such as wallets, chart reading info, and more. We are very excited about this and hope that you will be as well.
For today’s video & blog, we are taking a look at a MyEtherWallet tutorial. MyEtherWallet is an online wallet where you can hold any token on the ERC-20 network. The ERC-20 network is better known as the Ethereum Network. While Ethereum is the base for the network, there are several other tokens that are also on the network. Some of these include, EOS, Quantum, Tron, & Internet Node Token. The fact that you can own all of these tokens and keep them on the same wallet is a huge plus to creating a wallet here.
The wallet is pretty straight forward and offers many standard features of a wallet. It offers support for a hardware wallet such as Trezor or Ledger. MyEtherWallet provides you with multiple ways to unlock your wallet after you create it. The two easiest ways are with either the Keystore File the site provides you with or the Private Key the site provides you with. MyEtherWallet suggests using some other methods, but those are the two easiest ways (and most likely what normal investors are using). You are given both of these tools in the sign-up process.
MyEtherWallet Problems
Personally, I love MyEtherWallet. It’s a great wallet, but there are two common problems people run into with this wallet. First, because of the nature of the online storage of this wallet, if you lose your Private Key or Keystore File and are unable to get into your account, then you will indefinitely lose whatever tokens are in your wallet. MyEtherWallet cannot help you to restore them. For this reason, there are warnings MyEtherWallet gives you as you sign up detailing how to protect your account. Phishing is extremely common for this wallet. Just use common sense and you should be fine. The best way to avoid phishing is to only go directly to the site by typing the URL in the address bar instead of ever clicking a link to go to it.
The second problem people have is they have a hard time figuring out how to send tokens away from MyEtherWallet. If you look up on the top right of the wallet, you will see this information:

If you are unfamiliar with the Ethereum Network, you may think this is the stock price for gasoline. However, Gwei (or Giga wei), is the fuel that runs the network. In order to send tokens back to an exchange from MyEtherWallet you must have Ethereum also stored on your wallet. It doesn’t have to be much, but you need some to cover the transfer fees for your other tokens. I suggest adding about $10 worth of Ethereum to your account before you ever add tokens. This way you will have your transaction fees covered for a while.
To find out more about this wallet, please watch our “MyEtherWallet Tutorial”. Thanks for reading!
How to Buy NEOGAS
 If you have been paying attention during the latest bear run on the cryptocurrency market, then you have seen a few coins that seemed to be able to take the blows better than other. Three coins that seemed to stand tough during the dip were Waltonchain, NEO, & GAS. Don’t be confused by the title of this article, How to Buy NEOGAS. NEO & GAS are two different tokens, but they are on the same platform. They are attached at the hip. When NEO drops in price, GAS is usually follows the same trend. If NEO goes on a bull run, then GAS is also not far behind. Currently, GAS has been staying at about 30-50% of NEO’s price. So let’s look at the relationship between the two coins.
NEO and GAS both have 100 million tokes as their total possible supply. The thing that separates the two from each other is that NEO cannot be divided. GAS, however, can be divided into smaller shares distributed across the total supply of coins. While I personally do not believe that GAS will ever be able to pass NEO, the ability to divide the coins does make it likely that one day the price of GAS may get much higher than 30% of NEO’s price.
When it comes to choosing NEO or GAS as a coin to invest in, my advice would be to actually make a choice. They are both great coins with strong futures, but since their movements seem to mimic one another, it would be better to invest in only one of the coins. This would allow you to allocate part of your portfolio to other coins with potential. Now that you understand a little about NEO & GAS, let’s look at how to buy NEOGAS.
Using Kucoin to Buy NEOGAS
While technically the name of the token we are looking at is NEOGAS, you will most likely only find it under the name GAS on most exchanges. You can buy GAS on many bigger exchanges such as Binance. The exchange we will be looking at is Kucoin. The Kucoin exchange is unique because it offers more options than just trading ETH or BTC for its coins. You can actually trade NEO on this platform (which demonstrates the usefulness of NEO itself).
Before you begin to learn how to buy NEOGAS, you need to be able to get your money on an exchange. The obvious choice is Coinbase. Chances are that if you are looking into how to buy altcoins such as NEO or GAS, that you already have experience with Coinbase. If this is your first time moving your money from Coinbase to an exchange, then welcome to the real crypto world!
On Kucoin, hover over the $ symbol on the top of the page. Then move your cursor down to click on “Deposit”. The default coin to trade with on Kucoin is KCS. This stands for Kucoin shares and is the coin ran by the exchange. Simple click the dropdown to select Bitcoin from the list. Then send your BTC from Coinbase to the Kucoin BTC address you are provided with. From that point, all you need to do is make the actual exchange. To see exactly how this is done, watch the tutorial video, “How to Buy NEOGAS”. It’s a very simple process.
Thanks for reading and good luck with your crypto investments!
How to Install WordPress
 During our Web Wednesday series, we have been showing you how to create a website from start to finish. We have walked you through choosing a domain name, choosing a hosting package, & setting your nameservers. Now it is time to move on to the next step and we are going to show you how to install WordPress to your website.
How to Create a Whiteboard Explainer Video in Minutes
 We are going to show you how to create a whiteboard explainer video in minutes. There are many reasons to consider adding an advertising video to your website or social media account. People love videos. They consume them at such an astounding rate that YouTube has now passed Facebook in popularity (in terms of number of monthly visitors). While your marketing video most likely won’t go viral due to its lack of cute babies or frisky felines, it can mean a lot to your business and customers.
How to Buy FunFair Coin on Binance
 Over the last few weeks, the cryptocurrency market has really struggled to find its footing. Bitcoin has dropped substantially recently and is having a hard time recovering. Still, multiple times it has gone down around $10k and refuses to go much lower. For those of us who believe in cryptocurrency and Bitcoin, this is a dream time to make investments. The price of the coins are dropping because of the destabilization of Bitcoin; not because of their own merits. One of the coins that smart investors are looking at is FunFair (FUN). In today’s tutorial video, we show you how to buy FunFair coin on Binance.
Buying FunFair is actually pretty simple if you already have a Coinbase account and an account on Binance. If you don’t head on over to both of those sites and create an account on both. Once you have logged into your Binance account, scroll up to Funds>Balances at the top of the screen. Once you are here, click Deposit next to Bitcoin on the listing. Copy the Bitcoin address and head back on over to your Coinbase account. If you don’t have any funds, make sure to make a deposit. Once you have Bitcoin in your Coinbase account, click the Accounts tab. From there, all you have to do is click send and then paste your Binance BTC address. Confirm the address is correct and send the Bitcoin over. Sometimes it takes a few hours, but most of the time your BTC will hit your Binance account within 30 minutes to an hour.
But Why Buy FunFair (FUN)
If I purchased any coin that I ever heard someone say they liked, I would have one of everything (except BitConnect of course!). You can always find someone on Twitter or a subreddit that absolutely love virtually any coin out there. Because of that, you must be careful taking advice from people. They most likely have ulterior motives and are holding bags of whatever they are trying to pump to you (pump is a word that means someone is trying to hype a coin just so the price goes up). You HAVE to do your own research. Please, don’t take my advice. Don’t take a YouTubers advice. Don’t take the random cat lady on Twitter’s advice when it comes to crypto… even if she has a cryptokitty. You must investigate each coin to find out what kind of technology it has behind it. The technology is what will give many of these coins staying power.

FunFair is a coin I like a lot because the technology behind it seeks to solve the problems of the online gambling community. This is a huge market marred by scandals and untrustworthy individuals running online casinos. FunFair is seeking to make all gambling transactions & bets run through the blockchain. This completely guards against cheating. One other incredible feature of this new system of gambling is that players can pull out their coins in real time instead of having to wait weeks or sometimes months for an online casino to pay up. This coin has a lot of potential and is one to watch!
Thanks for reading & don’t forget to watch our tutorial video, “How to Buy FunFair Coin on Binance.”
Why Outsource with Upwork
 There is an unseen world when it comes to any digital service. This includes SEO, graphic design, logo design, web design, web development, & much more. Almost every web company on the internet outsources at least some of their work. It’s a problem that comes with being small enough to not turn down any business opportunities and not profitable enough yet to hire additional staff members. Outsourcing can be looked at as the “dirty little secret” of digital services. You would be surprised at just how many of the digital services you have paid for involved situations where companies outsource with Upwork.
Upwork is a large freelancer site. Users can have two different types of accounts there: Freelancer or Client. I will give you my opinion on actually freelancing for Upwork, as I have done it. I don’t suggest it at all. The same reason why we will use it on the client side is the same reason why being a freelancer is not a good deal on Upwork. All of the clients want the most work done for least amount. As a reputable web or graphic designer, that makes for very difficult working conditions. As a freelancer, I found that the expectations of the clients were quite unreasonable. I was basically getting a full-time workload for what would amount to a minimum wage payment (or less). Just a warning: be careful as a freelancer on Upwork.
Outsourcing with Upwork as a Client
The client relationship with Upwork is much easier. If you read the above complaints about being a freelancer on Upwork, then please take that in consideration when you hire people. You are going to be hiring good workers who are diligent. However, it will be hard for them to ever get inside your head to understand what you actually want. Be lenient & communicate well with your freelancers and you will find many of them will go out of their way to try to please you.
As a Client, you can post jobs pretty easily. To see how to post a job, please watch our tutorial video above “Outsource with Upwork”. Once you do this, the key is to find the right candidates for your job. I will reiterate, the most important skill a freelancer will have is communication. Most of them will be able to technically perform what you need… if they understand it. Be very thorough in your vetting process to make sure that the freelancer you hire does, in fact, understand you and communicates well.
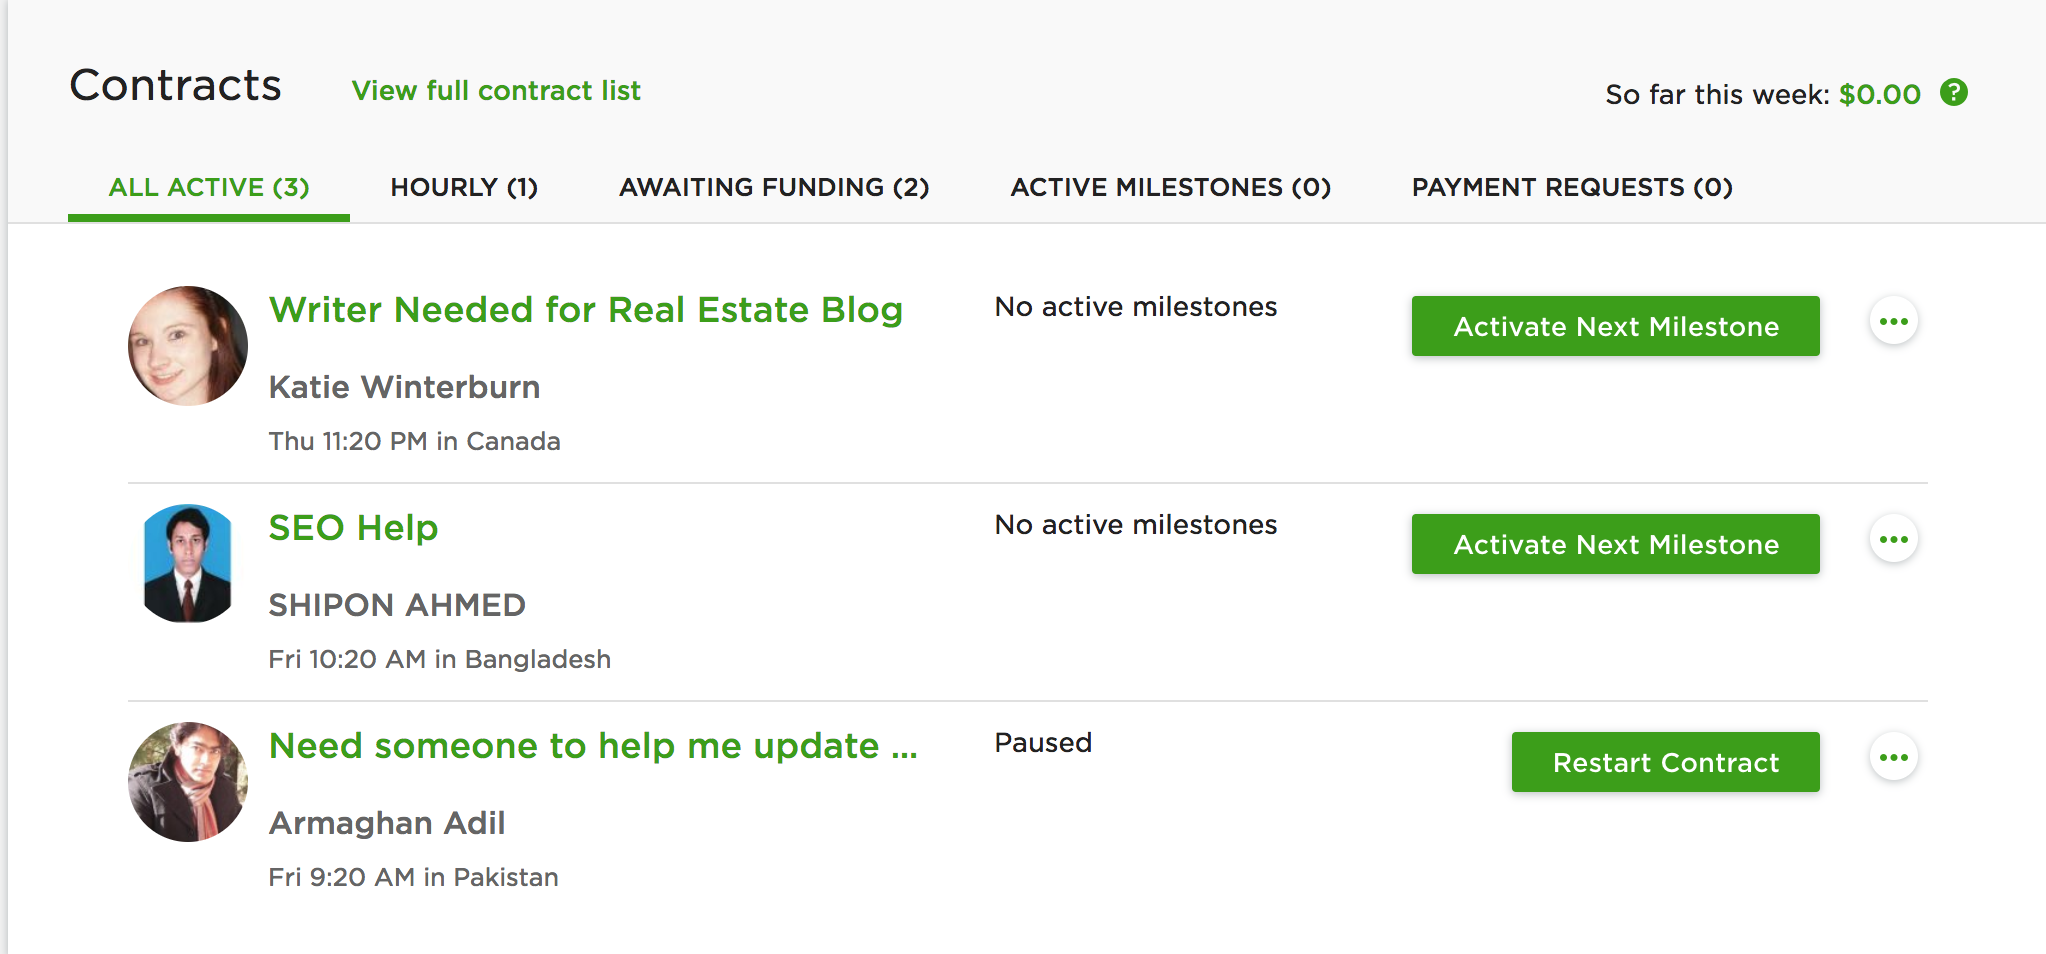
Be leery of candidates who “over-communicate.” I know that may sound a little opposite of my earlier statement, but communicating well and over-communicating are not the same thing. You want to be able to give your freelancer a job with details included and trust them to complete the job. Of course, some clarification will most likely be necessary. However, if your freelancer is going to call, text, or Skype you 20 times about every task then you might want to consider doing the task yourself. The whole point of outsourcing is to pass the job along to someone else.
We hope this has been helpful for you. Thanks for reading!
How to Set Up Hosting and Nameservers
For our Web Wednesday video series, we are showing you how to build a website from start to finish. In last week’s video we showed you how to choose your hosting package. We recommend using Hostgator as it has a simple to use cPanel that makes setting up a website there very smooth. Once we have chosen our hosting package, now we must learn how to set up hosting and nameservers for our website. It may be a little intimidating at first for those new to website building, but it is actually quite easy.
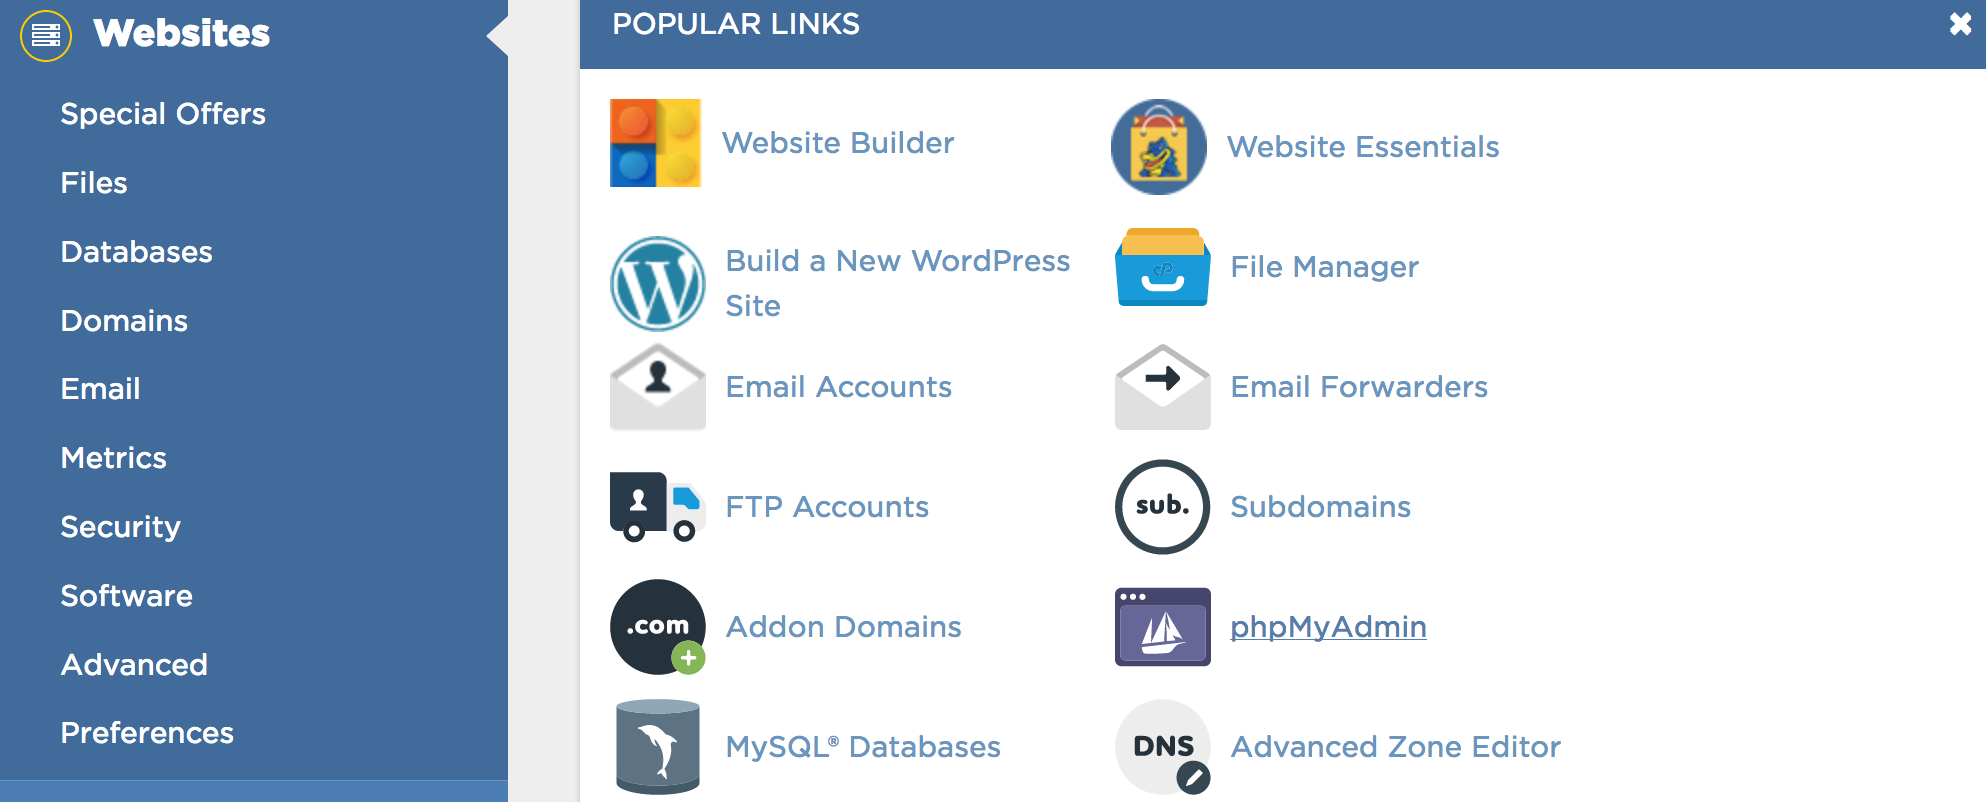
The first thing that users will notice when they sign into their Hostgator account, is the interface of the cPanel. The cPanel is the admin by which you can tweak anything having to do with the backend of your website. This includes the File Manager, Redirects, mx Records, & more. A large portion of available sections on the cPanel are virtually useless. If you do not know yet, every site you visit that sells hosting, domains, or online marketing solutions, unashamedly try to push every product under the sun. So pay attention in our “How to Set Up Hosting and Nameservers” tutorial video above and we will reveal to you which icons you actually need to pay attention to.
Setting Your Nameservers
Since GoDaddy (or whatever domain service you own) controls your URL address, you must make GoDaddy communicate with your new hosting company. When someone visits your website, GoDaddy must be able to send visitors directly to where your website is hosted at. To do this, you must be able to let GoDaddy know where to send the visitors to. You do this through setting what are called nameservers.
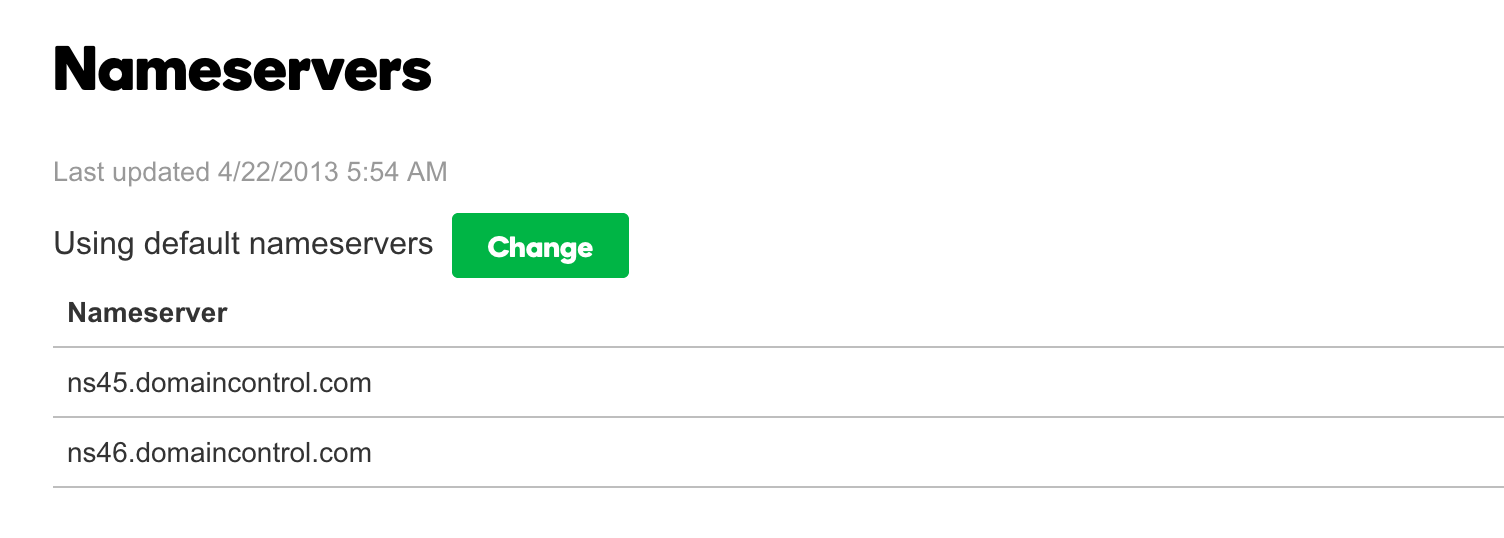
If you navigate to the right side of your cPanel and scroll down the page, there is a section that contains your account information. Within that information, your nameservers are listed. They will generally be something like ns32.hostgator.com & ns33.hostgator.com. Your nameservers will always be sequential in number. This makes setting them through GoDaddy fairly easy.
Once you have located your nameservers on Hostgator, highlight and copy the first one by hitting cmd + C for Mac or ctl + C for PC. Navigate to your GoDaddy account. Once you have entered your account, click on “Manage DNS” next to the domain you are looking to host your website on. One of the options you will have on the Manage DNS screen will be to set your nameservers. Initially, “Default Nameservers” will be the current setting. To change the setting to reflect your Hostgator nameservers, simply click “Change”. In the first box, paste the nameserver address you copied in from your Hostgator account information. Then, paste the same address in the second box and simply change the number to reflect your other nameserver. After you have placed both nameserver addresses in the boxes, click save.
And just like that, you are ready to install WordPress! Thanks for reading & don’t forget to watch our tutorial video!
Learn to Animate in Less than 10 Minutes
If you are looking to learn to animate in less than 10 minutes, then you have came to the right place! At the Online Business Realm, we are always showing you tricks, tips, and methods to streamline your online business acumen. On Tech Tuesdays, we go in depth showing you how to do things involving technology, computer programs, & design. Today, we are going to teach you how to animate.
 Have you ever had one of those ideas that you just knew is absolute gold, but you had no idea how to even begin to make it possible. It’s like the time I had this idea to create a pillow with a pocket for your iPhone. I told my wife about it and tried to convince her to make some for the Etsy Shop she had at the time. She thought it was a terrible idea and made so much fun of me. I had absolutely no way to make this pillow. Needless to say, the pillow didn’t get made. No less than 12 months later, guess what pops on my TV Screen… but an infomercial for a pillow with a pocket. There it was. $19.99 for two as a matter of fact!
The point of that story is sometimes when you get a good idea you have to go for it. I had one of those ideas pop into my recently about creating a cartoon. The only problem was I had no idea how to animate, and finding a professional animator was going to cost way too much money. Remembering my pillow with a pocket snafu, I decided that anything I don’t know, I will learn. I will not let another idea pass me buy. So I learned how to animate in one weekend.
Using Adobe Animate to Create Videos
 When I first started using Adobe Create Cloud, I only had it for Photoshop. I never dreamed that one day I would be able to use the majority of the apps within Creative Cloud. As of this weekend, I have now added a new skill to my Adobe repertoire, as I learned how to use Adobe Animate. And I was able to learn how to animate in less than 10 minutes. It is very similar and has a lot of the same tools & functions as other Adobe products. That makes the learning curve much less steep than it would be for a first time Adobe user.
The most confusing thing about using Adobe Animate is learning how to make the objects move. My first attempt at animation involved manually moving each object frame by frame. However, I knew there had to be a simpler way to animate simple shapes. Then I discovered how to use the Classic Tween. Using the Classic Tween is extremely simple and allows your objects to move evenly and fluidly throughout an animation. To see exactly how to use the Classic Tween & to see how to learn to animate in less than 10 minutes, please watch the tutorial video above!
Thanks for reading & good luck!

 If you have been looking for a how to set up Facebook page cover photo tutorial, then you have come to the right place. Feel free to watch our video, but also let’s look at why it is important to set up your page correctly. Facebook, as a corporation, feels like it is time to once again






How to Build Reddit Karma Quickly
How to Build Reddit Karma Quickly